Sunday 13 November 2011

...so cute I cried!

(That was my feedback to the eBay seller who I got my latest cupcake boxes from!)
They are absolutely adorable! I've given out several already. In fact I hung on to write this post as it may have been seen by Fiona, Sarah, Karen, Kellie, David, Nicola, my Dad... Actually the last one is a lie, my Dad can't text, I sincerely doubt he's following my blog, but anyway I am now able to tell the world about meri meri products without the fear of spoiling a gift surprise.

So I stumbled on meri meri (an award winning designer of paper products) by seeing their stuff in a gift shop in Clifton and then finding more of it for sale on the web. So enough of the suspense... here is the "Patisserie shop" gift box that houses 4 cupcakes:-


Just look at that little window showing my raspberry cakes for Kellie :)


And here it is in it's full glory with it's mega-cute sloping roof with ribbon tie. Ahhhh!

And there's more, lots more, here on their lovely website:-

http://www.shopmerimeri.co.uk/

I bought the stripy ones and the flower shop that may well turn up at your home if you know me in real life.

I do however, tend to buy a lot of plain white boxes and embellish them for different occasions.
Here was Monty's 12 birthday cupcakes for his 2nd birthday party:-


Not a great photo but you can get the general idea of a 12 box of cakes with ribbon.

And when I took the creativity a bit further I added some embellishments to a white cake box for a "Where's Wally?" party by printing some pictures off the Internet and coordinating some parcel tie:-


4 red velvet cupcakes with a chocco topper and red edible glitter.


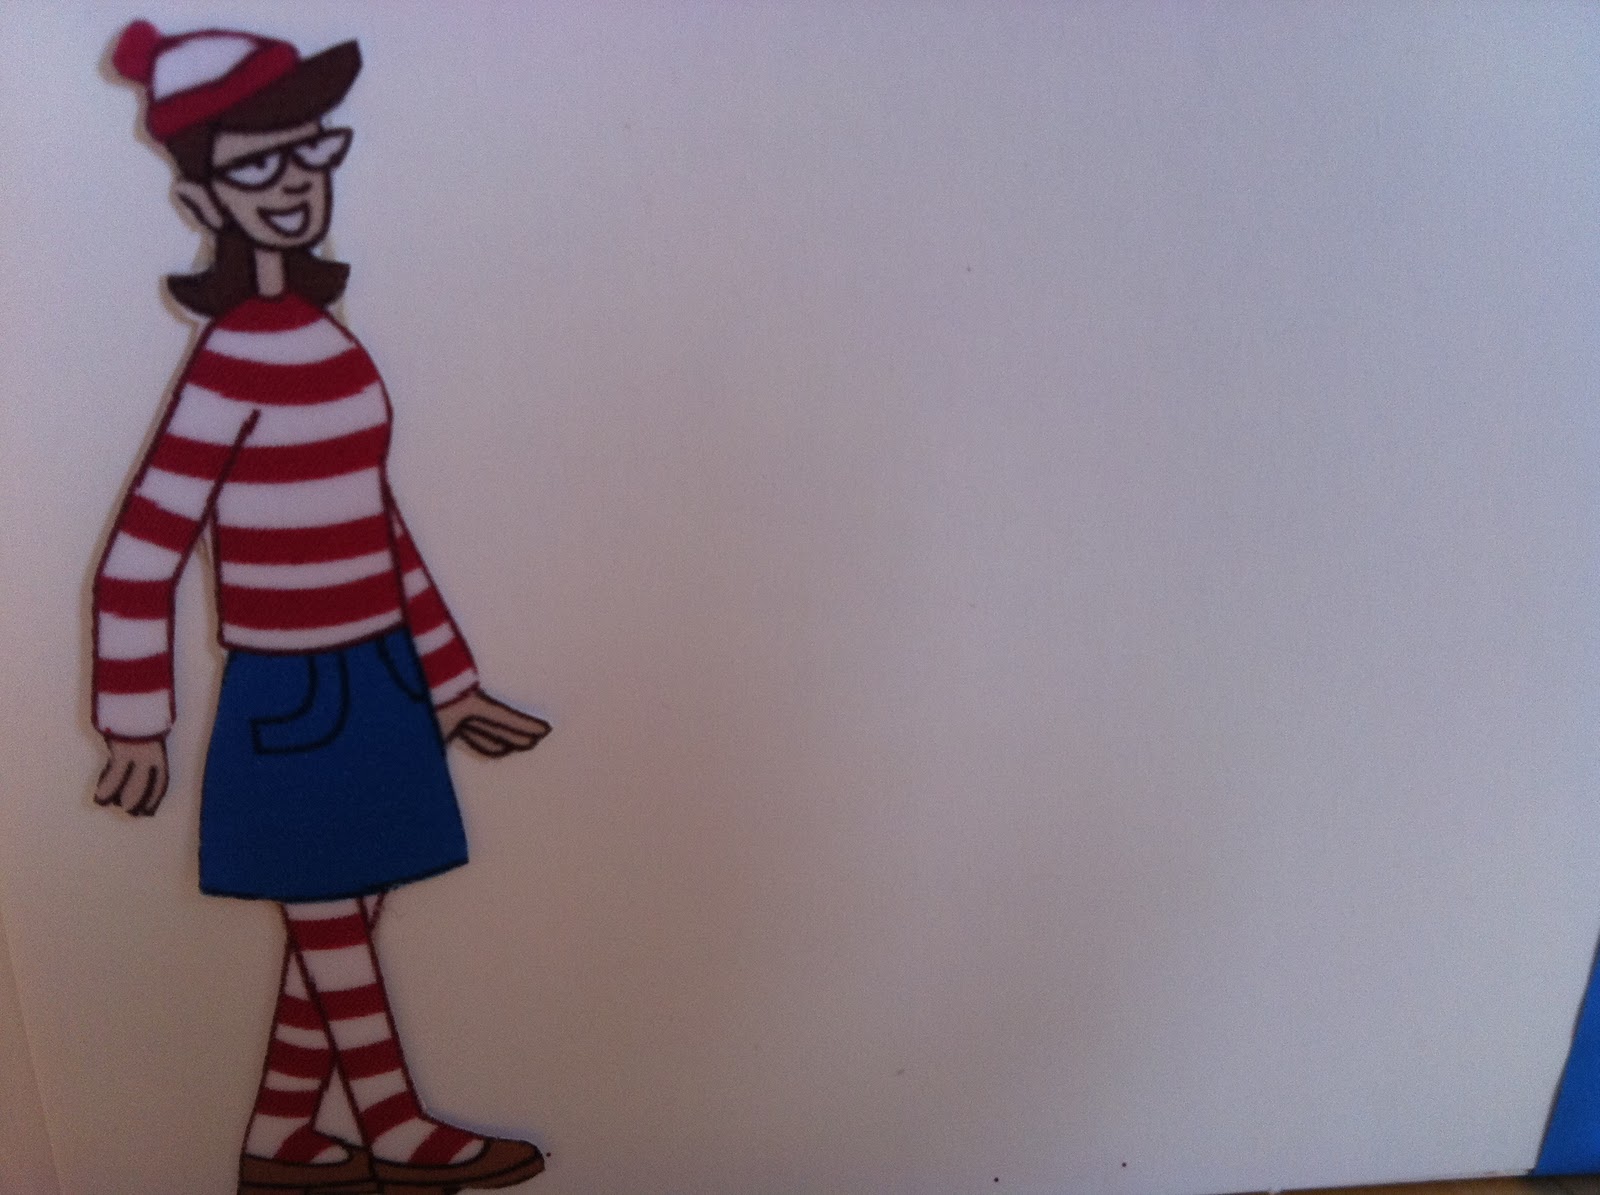
And here's the sides you can't see in the above picture
(I forgot to photograph the Wally dog - apologies!)


It's making me a bit sad looking at these pictures; they had the last of my Dr Oetker (unnatural) red food colouring that has seen me through many a batch of successful red velvet cupcakes. I know I should be alarmed that the whole of Europe felt the need to ban it's e numbers but I just want the stuff back - nothing else comes close to making cakes red and if it does it tastes of beetroot or chili or has crushed beetles in it.

Anyway, back to the boxes...

I also made a lemon individual one, that had no banned substances in it whatsoever:-


So I think that is pretty much all the cupcakes I have been making, except for the mammoth amount for the Cancer research charity softball-athon:-


Thanks again if you sponsored me for my bake-off or if you came up to Ashton court to support and buy a cake.

Clearly a lot of my life is taken up with baking and I made the decision a couple of days ago to have a "cake break" just temporarily, in case I got so big that I needed to be craned out of my house. My dreams occasionally flit between this eventuality and new frosting varieties; I really must stop watching videos of kitchenaids just before bed too - that's not helping! And then it was Nicky's birthday, and I tried to explain my "cake break" whilst giving her 6 wrapped clementines (needless to say the clementines didn't quite get the same reaction as the cakes she had last year). I'm "that girl" who brings cake. I'd have been confused if I was her too; awkward!

And then I got this really lovely book as a thank you for some lemon cupcakes I made and it's opened up a whole new world of Christmas cupcake ideas and, well, I'm just going to have to really, aren't I.....!


Right, I should go now because I have miniature robins to source from eBay for a December project.

J :)

P.S. Nicky, tell me what cake(s) you want! ;)

Sunday 4 September 2011

This was GOOD beetroot!

I've lapsed! For the first time in 2011 I didn't post anything on my here for a whole month, and the ironic thing is, I had more free time during August because of the school holidays than at any other point in the year! Nevermind, it's very early September and I enjoyed my holiday and so many things food and Art related that hopefully, I've plenty of things to blog about over the next few months :)

One of my Summer highlights was to have a dinner party for 4 friends and they all got to have this lovely beetroot. My inspiration came from an article that I ripped out of "Flavour" (a freebie foodie mag for the South West). I'm not sure if they still give them out for free and if they do where, but when I saw this recipe I knew instantly that it would be a great starter. I'm a recent convert to the merits of beetroot, mainly because the vac-packed pickled variety I tasted as a child did nothing for me then, and does nothing for me now. Fresh beetroot, however, is just amazing paired with cheese and salads. If you like goats cheese and beetroot, you'll love this - if you're unsure of those things I still think you'll like it. It's a brilliant mixture of flavours and it just looks so pretty...


So... if you would like to make Beetroot Carpaccio with Creamed Goats Cheese here's how:-

Quickly, before I begin I should say that this recipe had 3 beetroot stacks in mind, I felt, however that 2 was enough, but presenting even numbers never looks good on a plate. As I was debating the assemblage of them, Fiona had the genius idea of serving a "double decker" with the beetroot circles - perfect!

Oh, and the instructions recommended wearing rubber gloves not to stain your hands purple. I found them too slippery though and opted to just scrub my hands as best I could afterwards.

Ingredients

2 large raw beetroots
450ml (15fl oz) red wine
100ml (3.5fl oz) ruby red port
2 tbsp creme de cassis (optional)
225g (8oz) soft goat's cheese, any rind removed
3 tbsp basil oil
1 tsp snipped fresh chives
4 tsp balsamic syrup
1 punnet of salad cress
1 small granny smith apple
4 tsp toasted pine nuts
Maldon sea salt and freshly ground pepper

1. Place the red wine in a large pan with the port, creme de cassis (if using) and the sugar*. Bring to the boil, then add the thinly sliced beetroot and cook for 8-10 minutes or until just cooked through. Leave to cool in the cooking syrup, then place in the fridge overnight if time allows. Once marinated, drain the beetroot well and reserve the syrup to use again for poaching pears or plums or for marinating more beetroot.

2. Place the goat's cheese in a food processor with 2 tablespoons of the basil oil and blend until soft. Stir in the chives and add salt and pepper to taste. Spoon into a piping bag fitted with a 2.5 cm (1 inch) plain nozzle and chill for 10 mins to help the mixture firm up.

3. Immediately before serving, core the apple and shred into very fine strips. Drizzle each plate with a little balsamic syrup and arrange 3 slices of beetroot next to each other on top. Pipe the creamed goats cheese onto the centre of each of the beetroot, carefully placing another slice on top of each. Cut the salad cress with scissors and scatter on top with the apple strips and pine nuts, then drizzle over the remaining basil oil.

*There was just one problem with this recipe... it didn't say how much sugar to use to marinade the beetroot in. I used a tablespoon in the hope that the creme de cassis would add sweetness. I think it was about right. If you don't use that blackcurrant liqeur I'd definitely add a bit more sugar.


And here is the whole thing in it's entirety...


And a side-on picture, that does, I admit make them look a bit like oreos.

As soon as you plunge the cutlery into it, it bleeds the lovely juicy syrup all over the cheese and stains it purple to remind you it's beetroot though!  


And that's about it, except for a link to Flavour magazine...
http://www.flavourmagazine.com/bristol/index.html


J :)


Friday 29 July 2011

"The King" of cakes

Tonight my Mum's friend Genie is having a 60th birthday party. Somehow I ended up with the task of making 75 "Elvis themed" cupcakes for Genie as she is a huge Elvis fan (she even goes to watch him as a hologram on stage!) When I was given the cake brief a couple of weeks ago my mind started racing with the prospect of icing moulded into huge quiffs, music notes and stars cut from royal icing and maybe even making some cakes based on titles of his songs like "Hound dog" and "Jailhouse Rock".
However... my Mum knew I'd take any project to extremes so she quickly intercepted and said "No Joanne, your sister is going to order you some Elvis heads on Sugar paper from eBay, bit of frosting, plonk one on top, done! I was reluctant and didn't think I'd bother with a blog post, but...

I'm pretty damn proud of my "kings".

The Elvis heads arrived on sturdy sugar paper in sheets of 12...


Then I just needed to cut them out (all 75 of them!) I caught Jeremy fiddling with a "Donny Osmond head" in work last week. (What a sentence!) I presume he had some kind of food gift for Sue (who is a big Donny fan). It was lucky that Jeremy was hovering around the fridge the same time as me actually, as he was desperately trying to chill and peel the Donny head, until I pointed out that he just needed to cut the head free.

Moving on...

So I made 4 double batches of lemon cupcakes with a lemon curd centre and topped them with cream cheese frosting. I bought jet black cupcases, mainly because they were the cheapest greaseproof lined muffin cases in Occasion cakes, but they turned out to be a great choice. The black seemed quite rock'n'roll and was inkeeping with vinyl records I thought. It also contrasted well with the pale cream frosting. Then I bought "graphite" coloured edible glitter that also looked a bit "rock'n'roll" . I gave my Mother (apprentice helper) strict instructions to sprinkle the glitter from a height and then add the Elvis heads. Placed directly on top they looked weird, but when you pushed them down a bit into the frosting the heads looked "framed". I was pleased, very pleased.

And they went into the fridge to set...

And then got boxed, which always makes them look like a lot:-


Except for when you make 3 boxes full and that really does look like a lot...


75 Elvis cakes... done!

And now I'm thinking about whether you can buy sugar paper faces of your friends and family, I've seen people take a photo into the Asda bakery for birthday cakes before... or maybe I buy myself an edible ink printer like Bakerella has.

Even with an edible ink printer I'd struggle to make these though...
How cool are they....!

So the Elvis cakes are on their way to Wales and the cake stand is on loan again. The only things I'd have added if I'd been there to construct the cake tower would be to put the stand onto a section of bright fur fabric and plonk a small model Elvis on the very top tier which holds one cupcake. If only I'd kept my "Rockin' Elvis" from my Micra driving days...

And if you don't fully see the importance of Elvis cakes, listen carefully because "Percy"; the biggest Elvis fan I know, told me this important fact:-

‘The number of Elvis Presley impersonators has reached an all-time record high – there are now at least 85,000 Elvis’s around the world, compared to only 170 in 1957 when he died. At this rate of growth, experts predict that by 2019 Elvis impersonators will make up a third of the world population.’
Remember this blog post...

J :)

P.S. If you're looking for more Elvis themed food, try this...


Thursday 28 July 2011

Anyone for tennis cakes....?

I'd originally planned to make these for the Wimbledon finals but for one reason or another I just didn't get around to it. Then it was the end of season tennis dinner last Friday so I decided to make these and sell them for Chris's charity....

Tennis Ball Cake Pops.


Step 1... (The tennis court)

To make the court I bought a chunk of AstroTurf from B+Q and a paper box from IKEA. Then I marked out a tennis court on the back of the A4ish section of Turf, dug holes at every corner with a bradawl and a screw driver and sewed a tennis court outline onto the astro turf with a bobbin and some string. Then I plonked an A4 chunk of polystyrene underneath the astro, to dig the lollipop sticks into later.
I could've done with fashioning a miniature net, I know, time ran out though sadly.


Step 2... (The cake)

Then I made the "Buttermilk Poundloaf" from The Hummingbird bakery cookbook and when it had cooked I mixed the crumbs of this with a batch of vanilla frosting (recipe from the same book) and rolled together small balls.


Step 3... (Making the "tennis balls" yellow)

After making the cake balls I dipped the lollipop stick into a small amount of the melted yellow "candy melts" that I had purchased from Hobbycraft online...
http://direct.hobbycraft.co.uk/search/candy%20melts
These are basically tinted chocolate that melts easily (it has a high oil content). Food dye added to chocolate splits and is hard to work with. These melts are far from natural and I thought I'd dislike the taste, I didn't though, they tasted just like a caramac from yester-year.

Step 4... (Finishing touches)

Put the cake pops in the fridge and when they have set, use a Dr Oetker or Silverspoon icing device to pipe on the rubber detail. I also bought a black pen with edible ink to draw on a Wilson, Nike or Slazenger logo but the damn thing didn't work at all. Then I used a small black cake gel and these smudged too, it had to be just a sprinkling of edible glitter and that was all.

Step 5... Arrange cake pops into pre-prepared holes in astro court.


Step 6... Use mini "Wilton" cellophane bags to wrap a cake pop in, and tie with gold curling ribbon.


In addition I made...

Tennis ball cupcakes.


These were lemon, with a lemon curd centre and cream cheese frosting.
I then made "toppers", which are a candy melt with rubber detail piped on as though they are a tennis ball. I was really very lucky that they hadn't melted in the post as the packet warns they often do and then I'd have obviously had one big chunk of yellow, not loads of little round yellow buttons that just said "tennis balls in waiting" to me. (God, I'm weird!)


Then I squeezed them all into the fridge overnight...


Finally, I stacked them onto Kellie's wedding cupcake stand. I had a lot of AstroTurf left over from my court (you could only buy it in a strip 2 metres in length) so I displayed the tower of cakes onto a faux grass table-runner...


And I also made a few signs to tell people what they were and how much they cost... (mini frames from IKEA) and got some takeaway cartons, gift boxes and green serviettes.


Game over!

Now I need to think about what I'm going to make for Ant's charity Softballathon...

J :)

Monday 13 June 2011

Creative Cartography

Cartography... it's the sort of word you know if you're a Geography teacher, or if you've had the question in a pub quiz. Cartography = maps, and I wasn't surprised when my sister (who is a Geography teacher) was asked by the Art teacher at her school if she had old maps that her kids could cut up for a project. Maps are pretty, they're also personal with locations holding memories, and I'm noticing them being used more and more for cards etc.
So, where am I going with this... I wanted to make Kellie a wedding card that was a bit different and I thought I'd bring in this map idea. The idea would mean acquiring a map of where she's from and where her now husband hails from. This, I quickly discovered would mean £18 if purchasing Ordnance Surveys; that's one expensive card! Instead, I had to compromise by using google images to find the appropriate map sections and then printed them off my computer.
Then, I nicked an idea I saw in a Clifton village gallery and found a silhouette for a man and woman by having a search around the net. I printed the silhouette outline onto the samples of maps and cut them out. The first silhouette I started cutting out was really fiddly and it had too much detail, which took away from the
detail from the map. I kept it simple and chose "toilet door style" icons.
Then I stuck them onto card and triple mounted them with some of the different cards and papers that I had leftover from making Karen's wedding invites a few years ago. The result was this:-


The Bristol man worked the best I think, with 'Mark' having a 'Mangostfiled leg', 'Oldbury Court head' 'Cleeve Hill' torso and 'Frenchay and Staplehill' arms... 'Kellie' is just a kind of indecipherable Caerleon, but a very pretty one I think, with a bit of a pink and blue leg.


I've seen a similar idea with pictures and cards from 'Not on the High Street'...


 These are £8 and £12 and 150 people have reviewed them on there so I can't imagine how many people have bought them.. a heart is so easy to cut out too!

And some other nice cartography... when I was in Seville all the ladies were walking around with traditional little hand fans and in the window of one of the cutest shops I have ever seen was this one made out of a map of Seville...


I would've gone inside and got a better picture but the shop was shut for the 2 days after we noticed it - Annabel and I nearly cried looking at all the amazing things inside that we couldn't go look at! I might just have to book another city break so I can go back and visit it...

And then I thought, well, I might as well print off another page of a map for the location that Mark and Kellie will be living at now (to wrap their wedding gift in...) It's a small gift, but then, I did make them a lot of cupcakes for their big day:-


 In the end I actually wrapped the gift in bubble wrap and white tissue paper,
then printed the map onto tracing paper and tied with black curling ribbon.


And they lived happily ever after... ( just off the M32).

J :)

Wednesday 8 June 2011

The Hummingbird Flavour Cupcakes Learning Curve.

I can't get enough of these at the moment...
Hummingbird flavour cakes are a kind of delicious, sweet, "carrot cake meets banana loaf" kind of fusion made with bananas, pineapple, and oil which keeps them really moist. Some recipes I've found use coconut and varying degrees of oil and they all include roughly chopped pecans.
Hummingbird cake seems to have cropped up first in baking journals in the American deep south, and there are several ideas about the origin of it's name:-

►This cake is so yummy that it makes you HUM with delight, or happiness when you anticipate having a slice

►Hummingbirds drink nectar from flowers and this cake is just a sweet as a flower's nectar

►Hummingbirds themselves are associated with the lighthearted and sweet side of life, hence the name of this cake

►When the cake is served, people hover around it the way hummingbirds hover around nectar bearing flowers

►Although a cake made for people, it is a cake sweet enough to attract even hummingbirds

►Bananas and pineapples come from the tropics, and the national bird of Jamaica is a hummingbird...could this be how it got its name?

The most complimentary topping has to be cream cheese frosting and for the wow factor you could use a slow-dried pineapple slice or plonk on a pecan if you've got a bit less time:-


The sliced pineapple really does end up looking like a flower!

So, having tried a few, I believe I have found the ultimate Hummingbird cupcake recipe. The measurements are in cups as pretty much all Hummingbird recipes on the net are from the U.S. I have taken the basis of the recipe from Choccylit (a baking hero of mine) who is a software quality engineer by day, cupcake maker extraordinaire by night, she's great, check her out here:-


My usual dilemma arose when I saw the words "baking soda" and I wasn't about to go combining ratios of cream of tartar, baking powder etc to get as close to this, only available overseas, baking agent. I plunged in and used baking powder - DON'T! 48 cakes-in-the-bin later, I took a deep breath and repeated the recipe with exactly the same ingredients, except I used bicarbonate of soda - PERFECT! (and they were a completely different colour). 

Recipe (Makes 24)

Ingredients:

3 cups flour
2 cups caster sugar
1 tsp cinnamon
1/2 tsp salt
1 tsp bicarbonate of soda
3 eggs
3/4 cup veg oil (I used groundnut, and the time before walnut oil)
1 8oz can of crushed pineapple, with liquid
2 large mashed, very ripe bananas
1 cup coarsely chopped pecans

Method:-

1. Mix flour, sugar, bicarbonate of soda, cinnamon, salt with a balloon whisk in a good sized bowl.
2. Beat eggs.
3. Add oil and vanilla to beaten eggs and mix until somewhat combined.
4. Add egg/oil/vanilla mixture to flour/sugar/bicarb/cinnamon/salt mixture.
5. Mix together pineapple, bananas, pecans until combined.
6. Add to the rest of ingredients and stir to combine.

7. Bake at 350 (180) degrees for about 25 minutes until golden and a toothpick inserted comes out clean. Check also that the sponge bounces back when you touch it slightly. Do not check until 2/3 of the cooking time has elapsed... (tip for all cakes!)

Then to top them with cream cheese frosting...

Hummingbird bakery recipe that I've talked about before is perfect for this:-


And if you want to top with a pecan...


And an extra little dusting of ground cinnamon...


Another valuable lesson when making these was to use greaseproof-lined i.e. more expensive cupcake cases, as the cases go a horrid dark colour otherwise. Culpitt red or blue gingham ones were perfect.

Or, if you're feeling more adventurous and want to make some pineapple flowers (a few days in advance...)

You need to:

Take a ripe pineapple.
Chop off the top and bottom.
Carve off the outside without wasting too much.
Remove every single "eye" with a small knife or melon baller.
Finely slice circles of pineapple and set them out on lined baking sheets.
Bake in a low oven (110 degrees) for 30 mins, turn, bake again, repeat until tops are dried out and edges are changing colour.
Remove from tray and leave to completely dry out in the air by resting them on top of egg boxes.

Do not put them away to store in a Tupperware until they are near enough completely dried out - the result was mould! I may not have seen this through, had I not been making them for a wedding. Lots more deep breaths were needed to calmly start the flower making process again (so happy I did though...)


They look terrible like this.. but don't panic, in hours, or even days,
on top of your cakes they will look like this...


I'm not sure that something that looks this natural should then have edible glitter sprinkled over them, but I've a compulsive need to bling up my cakes that I can't shake off. In any case, even a wonky flower can be salvaged and cut down to make one that resembles a primrose, (use sharp scissors!) - and just a little glitter....??


After making and taking about 40 of these to Kellie's wedding last Saturday, I've got 12 of them left in my freezer ready to decorate this weekend; form an orderly queue...!

J  :)


Sunday 22 May 2011

Just my type.

I have been thinking about typography, I've always had a bit of a fascination with it. When I was about 10 my Mum bought me this book from the school book club. I spent hours tracing and duplicating letters and marvelling over how the word frozen appeared to melt etc. - I adored this book...


(...and so did a lot of other people, judging by the statement on the front cover.)

I guess the appeal of a book like this is far less now computers are in abundance; nothing like seeing print on pages though! I admit, I was quite blown away with Nicky's kindle last week, but I like fonts on pages and I guess that's pretty fortunate, (being a reading teacher!)

But I like nice typography everywhere, in Artwork, on my food packaging, on buildings - it pleases me enormously when word(s) are presented in an unusual or interesting or even just an appropriate way.

So I thought I'd write about some recent purchases and creations. I'll start with the purchases...
Using the wartime propaganda font and layout from "Keep Calm and Carry On" and the "What Would ****** Do?" slogan, the people at "Not On The High Street" came up with this poster that I have bought and framed for my kitchen wall. I was slightly sore at Jamie when he intervened with Education and it's "failings" but the more his "Dream School" series went on the more I think he appreciated how difficult the task can be. You're forgiven Jamie, and you can still be an inspiration for my cooking... (I'm sure you were petrified for a minute there....!)


I love that idea to replace the crown with a chef's hat!


You can buy a copy (in a choice of 3 colours) here:-


You can also buy "What Would Delia Do?" that does, admittedly, roll off the tongue a bit better, but she lost me a bit when she started cooking with tins of mince last year. (You're only as good as your last book!)

And IKEA have a great new range of "odby", rounded edge frames that set it off well I thought.


Then I spotted this in M&S and I had to get one...


Marks and Spencers typography is so well done sometimes. like in this tetra pack of milk bottle sweets...
so cute!


The above is a picture borrowed from "Bowie Style's" post on typography, where she has included more examples from the sweet department at Marks. If you're interested...

http://printpattern.blogspot.com/2010/01/typography-marks-spencer.html

I have also completed another long overdue project. I stumbled on the work of Craig Damrauer a while back and I think it's fab! He's called it "New Math" and it's basically simple equations that define words.

This has been framed for my bathroom:-


He's just got it so right with these designs. The font is clean and simple, (something like Arial narrow??) and Maths IS blue for me, I don't know why it just is. In the same way that cheese and onion crisps should be GREEN and Salt and Vinegar BLUE. I don't know why Walkers do it..., Golden Wonder had it right!
Other New Math designs I really like are:-


He's got loads on his website, obviously, once the template was there, further work was easy ;) 
Some are really clever and appropriate for loads of occasions I reckon. You can buy his stuff on posters or t-shirts, obviously I didn't save the Jpeg and print it onto good quality paper as that would be stealing his ideas... 


And that leads me onto another bit of typography that I love. On the wall of kitchen in Harriet and Rhi's rented house is a poster and when we popped round for a coffee when they moved in Rhi said it was the poster that tempted her to take the place. It looked like the slogan had been hand printed onto paper but after a bit of googling I found the origin...


The poster formed part of an exhibition of Art on the London Underground (Glousester Road Satation). I've looked all over the Internet to try and find it as a poster but it doesn't exist so the largest I can print it with any quality left in the design is postcard sized. I found some nice little frames in IKEA to set it off quite well though....


The Art initiative on the underground is called "Platform for Art" and there is a book about it (on the designated website) that I might just have to buy...
http://art.tfl.gov.uk/

At work this week I was looking at all the good use of typography on the children's books I teach with and I thought about mentioning some of them but I think I'll save it for another day... I've got too much to say about children's books and they deserve a separate posting when I've got more time...
So finally, a couple of weeks back was Bella's (Annabel's) birthday. And it's been a while since I made some personalised paper so I got busy and made a few sheets. Quite nice for a bit of interesting (and thrifty;) personalisation....


The wrapping paper I settled on was the one I made with "Times New Roman" printed in various greys. And that was the reason I chose to finish it with pastel gift tie.


Another option was "Ariel" font with some bright parcel tie, but I didn't like that option as much.


And I also dis guarded the black print option with bold parcel tie colours. I did do this one Christmas however, and the black writing against gold and red parcel tie looked amazing!
It is also worth noting that the black enlarges better than grey on a photocopier if you wanted to wrap bigger presents and that it is good to wrap your gifts in tissue paper first if you're using rubbishy see-through paper on a works photocopier. I'm sure like me, you would never be unprofessional and do personal photocopying in work, however.... ;) This would also be nice if you printed the paper with the same sized name, used all different fonts for their name and chose a "kiddy" font such as comic sans if the present was for a child!

Okay, well, this blog post, plus making banana and walnut loaf cakes have helped me procrastinate for quite some time today, but I'd better get on with the work I am doing for my M.A in dyslexia teaching. To make the resources for my students in the most "reader-friendly" way I also bought an expensive font...

it's clever though, take a look...

http://www.clubtype.co.uk/index.html

(it writes in separate or cursive style, draws a grey outline for tracing over, puts "guidelines" above and/or below the writing and puts flicks on the letters for the first stage of learning how to do cursive (joined-up) handwriting.)

I also had a look at this one, but felt it was "over scaffolding"... ""Over scaffolding" seriously, there are some really poncy words banded about in Education...

http://www.readregular.com/english/regular.html

Food for thought though, I'm learning an awful lot about how the brain learns to read on this course, (whilst frying my own a bit).

J :)